< Back ×
2001 Chevrolet Astro CV Joint
My Vehicle Change Vehicle
2001 Chevrolet Astro
< Back to View All
Driveline, Axles & 4WD
- Department
- Prices

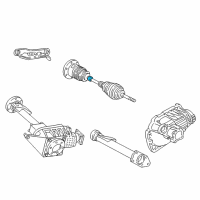
OEM (Genuine) 2001 Chevrolet Astro Joint Kit-Front Axle Propeller Shaft Front Universal
PartNumber: 23104840$51.12 MSRP:$88.98You Save: $37.86 (43%)Product Specifications- Notes: Astro, Safari; Front
- Other Names: Universal Joints
- Item Dimensions: 5.8 x 5.3 x 2.8 inches
- Item Weight: 1.70 Pounds
- Fitment Type: Direct Replacement
- Replaces: 26042371, 12471502, 12479126
- Part Description: 2001 Chevrolet Astro Joint Kit-Front Axle Propeller Shaft Front Universal
Vehicle Fitment- 2001 Chevrolet Astro | Base, CL, CS, LS, LT | 6 Cyl 4.3 L GAS
 Product Specifications
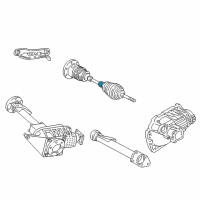
- Notes: Astro, Safari; 4WD
- Location: Driver Side; Passenger Side
- Other Names: Inner CV Joint, Inner Joint
- Item Dimensions: 7.8 x 7.1 x 6.7 inches
- Item Weight: 8.20 Pounds
- Fitment Type: Direct Replacement
- Part Description: 2001 Chevrolet Astro Joint Kit, Front Wheel Drive Shaft Tri-Pot
Vehicle Fitment- 2001 Chevrolet Astro | Base, LS, LT | 6 Cyl 4.3 L GAS
 Product Specifications
- Notes: Astro, Safari; 4WD
- Location: Driver Side; Passenger Side
- Other Names: Outer CV Joint, Outer Joint
- Item Dimensions: 6.8 x 5.7 x 6.2 inches
- Item Weight: 9.80 Pounds
- Fitment Type: Direct Replacement
- Part Description: 2001 Chevrolet Astro Joint Kit, Front Wheel Drive Shaft Cv
Vehicle Fitment- 2001 Chevrolet Astro | Base, LS, LT | 6 Cyl 4.3 L GAS
FAQ for Cv Joint Repair
Q: How to remove the deflector ring?
A:
You need to inspect the deflector ring and replace the deflector ring. Then you can tap the damaged deflector ring and discard the deflector ring.
By Bob
GM Specialist
01/11/2022Q: How to remove the wheel drive shaft inner joint and seal?
A:
You need to remove the large boot clamp, the tripot housing, and the bushing. Then you can wipe the grease off the tripot assembly roller bearings and housing. After that, you need to cut the small boot clamp, slide the tripot boot, and spread the spider spacer ring and the tripot spider assembly. Then you can remove the retaining ring, spider assembly, spacer ring, and tripot boot. Next, you need to clean the half-shaft bar and inspect the needle rollers, needle bearings, and trunnion for damaged parts.
By Bob
GM Specialist
01/11/2022Q: What tools do you need to replace the wheel drive shaft's inner joint and seal?
A:
You need to prepare the J 8059 snap ring pliers, the J 35910 small seal clamp tool, and the J 35566 large seal clamp tool.
By Bob
GM Specialist
01/11/2022Q: How to install the deflector ring?
A:
After putting the new deflector ring, you can put the pipe coupling against the deflector ring. After that, you can install the nut on the half-shaft bar.
By Bob
GM Specialist
01/11/2022Q: What tools do you need to replace the wheel drive shaft outer joint and seal?
A:
You need to prepare the J 8059 snap ring pliers, the J 35910 seal clamp tool, and the J 36652 drive axle clamp swage tool.
By Bob
GM Specialist
01/11/2022Q: How to remove the wheel drive shaft outer joint and seal?
A:
You need to place protective covers and the half shaft, cut through the swage ring, and seal down the half shaft bar. Then you need to find the half shaft bar retaining snap ring, discard the old constant velocity (CV) joint seal, remove the first chrome alloy ball, and tilt the CV joint cage in the opposite direction. Then you need to lift out the cage and the inner race, rotate the inner race, and remove all old grease and any contaminates. After drying all the parts, you need to check the CV joint assembly, replace any damaged parts, and clean the half-shaft bar.
By Bob
GM Specialist
01/11/2022See more FAQs (1)