< Back ×
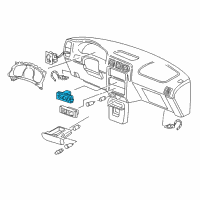
2001 Chevrolet Venture Blower Control Switches
My Vehicle Change Vehicle
2001 Chevrolet Venture
< Back to View All
A/C & Heating
- Department
- Prices
 $271.49 MSRP:
$504.46You Save: $232.97 (47%)Product Specifications- Notes: Venture; All
- Other Names: Dash Control Unit, Heater Control
- Item Dimensions: 10.9 x 6.4 x 6.6 inches
- Item Weight: 1.10 Pounds
- Fitment Type: Direct Replacement
- Replaces: 9380551, 09380551
- Part Description: 2001 Chevrolet Venture Heater Control Assembly
Vehicle Fitment- 2001 Chevrolet Venture | Base, LS, LT, Plus, Value, Warner Bros. | 6 Cyl 3.4 L GAS
- Product Specifications
- Notes: W/Rear Defogger
- Other Names: Dash Control Unit, Heater Control
- Item Dimensions: 15.3 x 4.3 x 4.3 inches
- Item Weight: 2.30 Pounds
- Fitment Type: Direct Replacement
- Replaces: 10301047
- Part Description: 2001 Chevrolet Venture Dash Control Unit
Vehicle Fitment- 2001 Chevrolet Venture | Base, LS, LT, Plus, Value, Warner Bros. | 6 Cyl 3.4 L GAS
- Product Specifications
- Notes: W/O Rear Defogger
- Other Names: Heater Control
- Item Dimensions: 14.8 x 4.5 x 4.3 inches
- Item Weight: 1.00 Pounds
- Fitment Type: Direct Replacement
- Replaces: 10301049
- Part Description: 2001 Chevrolet Venture Heater Control Assembly
Vehicle Fitment- 2001 Chevrolet Venture | Base, LS, LT, Plus, Value, Warner Bros. | 6 Cyl 3.4 L GAS
FAQ for Blower Control Switches Repair
Q: How to remove the blower motor switch-auxiliary?
A:
You need to remove the IP trim plate, remove the auxiliary blower motor switch retaining screws, then pull straight out from the IP to remove the auxiliary blower motor switch, and disconnect the electrical connectors from the blower motor switch.
By Bob
GM Specialist
29/10/2022Q: What is the proper way to install the blower motor switch-auxiliary?
A:
You should connect the electrical connectors to the blower motor switch, push in on the blower motor switch to install the blower motor switch, then install the auxiliary blower motor switch retaining screws, and install the IP trim plate.
By Bob
GM Specialist
29/10/2022