< Back ×
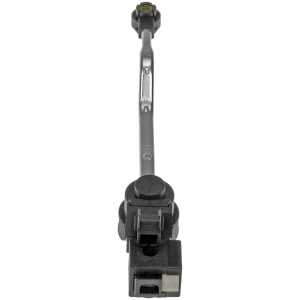
2001 Chevrolet Venture Shift Interlock Solenoid
My Vehicle Change Vehicle
2001 Chevrolet Venture
< Back to View All
Transmissions Components & Shifters
- Department
- Brands
- Prices
 $71.87Product Specifications
- Color/Finish: Black
- Connector Quantity: 1
- Connector Shape: Rectangular
- Connector Terminal Quantity: 2
- Connector Type: Female
- Housing Material: Plastic
- Installation Hardware Included: Not Required
- Mounting Hole Quantity: 2
- Mounting Hole Size: 0.26 In.
- Mounting Location: Ends
- Mounting Method: Flange
- OE Part Number: 26097679, 26064467, 26060737
- Package Contents: 1 Shift Interlock Solenoid
- UPC: 885484370791
- Wiring Harness Included: No Harness Required
- Part Description: 2001 Chevrolet Venture Shift Interlock Solenoid
Vehicle Fitment- 2001 Chevrolet Venture | All Trims | All Engines
FAQ for Shift Interlock Solenoid Repair
Q: What is the proper way to install the 1-2 shift solenoid valve?
A:
You should install the 1-2 shift solenoid (315A), connect the transaxle wiring harness, then install the case side cover.
By Bob
GM Specialist
01/11/2022Q: How to properly adjust the automatic shift lock control actuator?
A:
You need to pull out the tab on the adjuster block side of the actuator, then press on the adjuster block to compress the internal adjuster spring and disengage the adjuster teeth. Slide the adjuster block as far away from the actuator as possible. Finally, lock in place by pushing in on the tab.
By Bob
GM Specialist
01/11/2022Q: How to remove the 1-2 shift solenoid valve?
A:
You need to remove the case side cover, disconnect the transaxle wiring harness, and remove the 1-2 shift solenoid (315A).
By Bob
GM Specialist
01/11/2022Q: How to remove the automatic transmission shift lock actuator?
A:
You need to remove the steering column trim covers, the knee bolster, and the shift lever actuator, then disconnect the electrical connector from the automatic shift lock control actuator and remove the automatic shift lock control actuator from the steering column ball studs.
By Bob
GM Specialist
01/11/2022Q: What is the proper way to install the 2-3 shift solenoid valve?
A:
You should install a new O-ring seal onto the 2-3 shift solenoid valve if the O-ring was removed, then install the 2-3 shift solenoid, install the 2-3 shift solenoid valve retainer into the control valve body, connect the transaxle wiring harness, and install the case side cover.
By Bob
GM Specialist
01/11/2022Q: How to remove the 2-3 shift solenoid valve?
A:
You need to remove the case side cover, disconnect the transaxle wiring harness, remove the 2-3 shift solenoid valve retainer from the control valve body, remove the 2-3 shift solenoid, then remove the O-ring seal from the 2-3 shift solenoid valve only if it is damaged.
By Bob
GM Specialist
01/11/2022See more FAQs (1)