< Back ×
2004 Cadillac SRX Liftgates
My Vehicle Change Vehicle
2004 Cadillac SRX
< Back to View All
Door Handles, Locks & Related Parts
- Department
- Prices
 $803.02 MSRP:
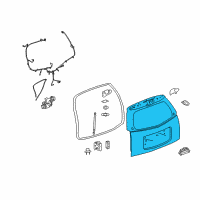
$1211.44You Save: $408.42 (34%)Product Specifications- Other Names: Lift Gate
- Item Dimensions: 49.0 x 11.5 x 62.9 inches
- Item Weight: 39.80 Pounds
- Fitment Type: Direct Replacement
- Replaces: 15254242, 15211325
- Part Description: 2004 Cadillac SRX Lift Gate
Vehicle Fitment- 2004 Cadillac SRX | Base | 6 Cyl 3.6 L GAS, 8 Cyl 4.6 L GAS
FAQ for Liftgates Repair
Q: What should you do before cutting out a stationary window?
A:
You should apply a double layer of masking tape around the perimeter of the painted surfaces and inner trim.
By Bob
GM Specialist
01/11/2022Q: What tool can you use to remove the window?
A:
You can use J 24402-A, J 39032, or the equivalent.
By Bob
GM Specialist
01/11/2022Q: How do you replace the rear compartment panel?
A:
You can disable the SIR system, disconnect the negative battery cable, remove all related panels and components, the sealers and anti-corrosion materials, inspect and repair as much of the damage as possible, cut the rear compartment panel, locate, mark and drill out all factory welds and remove the damaged rear compartment panel.
By Bob
GM Specialist
01/11/2022Q: How do you install the liftgate handle?
A:
You can connect the latch actuator cable to the handle, install the liftgate handle, install the nuts that retain the handle to the liftgate, install the liftgate applique, center the handle in the opening in the liftgate applique and tighten the nuts retaining the liftgate handle to the liftgate.
By Bob
GM Specialist
01/11/2022Q: How do you install the liftgate trim panel?
A:
You can replace any broken or missing retainers, connect the rear courtesy lamp electrical connector, align the two outboard locators on the trim panel, apply pressure to attach the clips in the lower portion of the trim panel to the liftgate, align the outboard clips around the window opening with the slots in the trim panel and install the liftgate screw.
By Bob
GM Specialist
01/11/2022Q: What is the removal procedure for the liftgate trim panel?
A:
The procedure is to remove the liftgate retaining screw, remove the trim panel, disconnect the rear courtesy lamp electrical connector, remove the liftgate trim panel and inspect for broken or missing retainers.
By Bob
GM Specialist
01/11/2022Q: What is the removal procedure for the liftgate handle?
A:
The procedure is to remove the liftgate applique, remove the nuts retaining the handle to the liftgate, remove the handle from the liftgate, disconnect the latch actuator cable from the handle and remove the liftgate handle.
By Bob
GM Specialist
01/11/2022Q: What can you use to install and align the service part?
A:
You can use 3-dimensional measuring equipment.
By Bob
GM Specialist
01/11/2022See more FAQs (3)