< Back ×
2005 Buick Park Avenue Air Temperature Sensor
My Vehicle Change Vehicle
2005 Buick Park Avenue
< Back to View All
A/C & Heating
- Department
- Prices
 $25.46 MSRP:
$48.06You Save: $22.60 (48%)Product Specifications- Notes: Park Avenue
- Item Dimensions: 2.9 x 1.2 x 0.8 inches
- Item Weight: 0.50 Pounds
- Fitment Type: Direct Replacement
- Replaces: 25036979, 12146312
- Part Description: 2005 Buick Park Avenue Fan Switch
Vehicle Fitment- 2005 Buick Park Avenue | Base, Ultra | 6 Cyl 3.8 L GAS
 $8.61 MSRP:
$15.58You Save: $6.97 (45%)Product Specifications- Notes: Inside Air Temp, AT Air Duct; Park Avenue; AT Air Duct
- Item Dimensions: 2.1 x 1.0 x 1.1 inches
- Item Weight: 0.30 Pounds
- Fitment Type: Direct Replacement
- Part Description: 2005 Buick Park Avenue In-Car Temperature Sensor
Vehicle Fitment- 2005 Buick Park Avenue | Base, Ultra | 6 Cyl 3.8 L GAS
 Product Specifications
- Notes: Park Avenue
- Item Dimensions: 4.2 x 2.2 x 2.1 inches
- Item Weight: 0.40 Pounds
- Fitment Type: Direct Replacement
- Replaces: 16145854
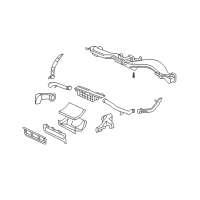
- Part Description: 2005 Buick Park Avenue Outside Temperature Sensor
Vehicle Fitment- 2005 Buick Park Avenue | Base, Ultra | 6 Cyl 3.8 L GAS
 Product Specifications
- Notes: Inside Air Temp, AT Cluster Plate; Park Avenue; AT Cluster Plate
- Item Dimensions: 3.1 x 3.1 x 3.0 inches
- Item Weight: 0.30 Pounds
- Fitment Type: Direct Replacement
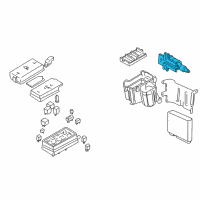
- Part Description: 2005 Buick Park Avenue Sensor Asm, Inside Air Temperature
Vehicle Fitment- 2005 Buick Park Avenue | Base, Ultra | 6 Cyl 3.8 L GAS
FAQ for Air Temperature Sensor Repair
Q: How to install the Air Temperature Sensor-Lower Left?
A:
First, you need to install the lower left air temperature sensor. Then, please connect the electrical connector to the lower left air temperature sensor. Finally, you should install the sound insulator.
By Bob
GM Specialist
01/11/2022Q: How to install the Ambient Air Temperature Sensor?
A:
First, you need to install the ambient air temperature sensor with the retainer. Then, please connect the electrical connector to the ambient air temperature sensor.
By Bob
GM Specialist
01/11/2022Q: How to remove the Air Temperature Sensor-Lower Left?
A:
First, you need to remove the sound insulator. Then, please disconnect the electrical connector from the lower left air temperature sensor. Finally, you should remove the lower left air temperature sensor.
By Bob
GM Specialist
01/11/2022Q: How to install the Air Temperature Sensor-Upper Left?
A:
First, you need to connect the air temperature sensor electrical connector to the sensor, install the left air temperature sensor into the air distributor duct and turn clockwise 1/4 turn. Then, please install the air distributor duct, the air distributor duct outboard screws, and the air distributor duct center screws, align the lower I/P trim to the studs and install the screws. Finally, you should install the left I/P trim panel, the right I/P accessory trim plate, the left I/P accessory trim plate, and the I/P outer trim covers.
By Bob
GM Specialist
01/11/2022Q: How to remove the Air Temperature Sensor-Upper Left?
A:
First, you need to remove the outer instrument panel (I/P) trim covers, the left I/P accessory trim plate, the right I/P accessory trim plate, and the left I/P trim panel. Then, please remove the upper fasteners retaining the lower I/P trim, pull the I/P trim off the studs and lower the trim out of the way, remove the 2 screws at the center of the air distributor duct, remove the screws at the outboard side of the air distributor duct. Finally, you should remove the left air temperature sensor, and disconnect the air temperature sensor electrical connector.
By Bob
GM Specialist
01/11/2022Q: How to remove the Intake Air Temperature (Iat) Sensor?
A:
First, you need to disconnect the intake air temperature (IAT) sensor electrical connector. Then, please grasp and remove the IAT sensor with a twisting and pulling motion.
By Bob
GM Specialist
01/11/2022Q: How to install the Intake Air Temperature (Iat) Sensor?
A:
First, you need to position and insert the IAT sensor into the rear air intake duct. Then, please connect the electrical connector.
By Bob
GM Specialist
01/11/2022Q: How to remove the Ambient Air Temperature Sensor?
A:
First, you need to disconnect the electrical connector from the ambient air temperature sensor. Then, please remove the retainer and the ambient air temperature sensor.
By Bob
GM Specialist
01/11/2022See more FAQs (3)