< Back ×
2005 Buick Rainier Pillar Panels
My Vehicle Change Vehicle
2005 Buick Rainier
< Back to View All
Interior & Exterior Trim
- Department
- Prices
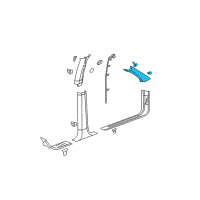
OEM (Genuine) 2005 Buick Rainier Molding Asm-Windshield Side Garnish *Light Opel Gray
PartNumber: 15782066Product Specifications- Notes: 2005-07, Gray
- Location: Passenger Side
- Other Names: Weatherstrip Pillar Trim
- Item Dimensions: 30.3 x 8.5 x 8.5 inches
- Item Weight: 2.20 Pounds
- Fitment Type: Direct Replacement
- Part Description: 2005 Buick Rainier Molding Asm-Windshield Side Garnish *Light Opel Gray
Vehicle Fitment- 2005 Buick Rainier | CXL, CXL Plus | 6 Cyl 4.2 L GAS, 8 Cyl 5.3 L GAS
- Product Specifications
- Notes: 2005-07, Gray
- Location: Driver Side
- Other Names: Weatherstrip Pillar Trim
- Item Dimensions: 32.6 x 5.9 x 3.3 inches
- Item Weight: 0.70 Pounds
- Fitment Type: Direct Replacement
- Part Description: 2005 Buick Rainier Molding, Windshield Side Garnish
Vehicle Fitment- 2005 Buick Rainier | CXL, CXL Plus | 6 Cyl 4.2 L GAS, 8 Cyl 5.3 L GAS
OEM (Genuine) 2005 Buick Rainier Molding Asm-Windshield Side Garnish *Cashmere E
PartNumber: 15782064Product Specifications- Notes: 2005-07, Cashmere
- Location: Driver Side
- Other Names: Weatherstrip Pillar Trim
- Item Dimensions: 30.5 x 4.6 x 3.0 inches
- Item Weight: 0.70 Pounds
- Fitment Type: Direct Replacement
- Part Description: 2005 Buick Rainier Molding Asm-Windshield Side Garnish *Cashmere E
Vehicle Fitment- 2005 Buick Rainier | CXL, CXL Plus | 6 Cyl 4.2 L GAS, 8 Cyl 5.3 L GAS
- Product Specifications
- Notes: 2005-07, Cashmere
- Location: Passenger Side
- Other Names: Weatherstrip Pillar Trim
- Item Dimensions: 30.5 x 4.7 x 3.0 inches
- Item Weight: 0.70 Pounds
- Fitment Type: Direct Replacement
- Part Description: 2005 Buick Rainier MOLDING, Roof Trim(Interior)
Vehicle Fitment- 2005 Buick Rainier | CXL, CXL Plus | 6 Cyl 4.2 L GAS, 8 Cyl 5.3 L GAS
FAQ for Pillar Panels Repair
Q: How to remove the Trim Cover-Rear Floor Trim Panel?
A:
You should lower the midgate, fold the hinged midgate filler trim panel back, release the trim cover retaining clips from the sheet metal, raise the midgate to the closed position and remove the rear floor trim panel by grasping and pulling straight out to release the retaining clips and the rear floor trim panel from the vehicle.
By Bob
GM Specialist
02/11/2022Q: How to remove the Garnish Molding-Windshield Pillar?
A:
You should start at the top of the garnish molding, carefully release the upper attaching clip that retains the garnish molding to the first pillar, release the remaining 2 retaining clips from the first pillar and remove the garnish molding from the vehicle.
By Bob
GM Specialist
02/11/2022Q: How to remove the Garnish Molding-Rear Window?
A:
You should open the liftgate, release the clips that retain the garnish molding to the liftgate, and remove the wire harness from the slot located on the garnish molding and the garnish molding from the liftgate.
By Bob
GM Specialist
02/11/2022Q: How to install the Trim Cover-Rear Floor Trim Panel?
A:
You should raise the midgate to the closed position, ensure that the retaining clips are securely installed on the back side of the rear floor trim panel, and install the rear floor trim panel by pressing the retaining clips into the sheet metal openings.
By Bob
GM Specialist
02/11/2022Q: How to install the Garnish Molding-Rear Window?
A:
You should position the garnish molding to the liftgate, install a wire harness into the slot located on the garnish molding, index the locating tabs to the corresponding holes in the liftgate and the retaining clips to the liftgate, push the garnish molding into the liftgate to fully seat the retaining clips and close the liftgate.
By Bob
GM Specialist
02/11/2022Q: How to remove the Trim Plate-Rear Floor - Front?
A:
You should lower the midgate to the cargo position, raise the hinged filler panel on the back of the midgate, remove the pushpins securing the rear floor front trim panel end covers by unscrewing the retainer pin, the rear floor front trim panel end covers and 2 push pin fasteners by lifting up on each end of the rear floor front trim panel, grasp the front edge of the rear floor front trim panel and pull straight up to release the retaining clips along the front edge and remove the rear floor front trim panel by pulling straight up to release the retaining clips along the rear edge and the rear floor front trim panel from the vehicle.
By Bob
GM Specialist
02/11/2022Q: How to install the Garnish Molding-Windshield Pillar?
A:
You should position the garnish molding to the vehicle, align the locating fingers to the corresponding holes in the first pillar, start at the top of the garnish molding and seat the attachment clips that retain the garnish molding to the first pillar.
By Bob
GM Specialist
02/11/2022Q: How to remove the Garnish Molding-Center Pillar?
A:
You should remove the front and rear door sill plates, move the seat to a forward position, release the 4 retaining clips that attach the garnish molding to the center pillar, disconnect the electrical connector from the temperature sensor and remove the garnish molding from the vehicle.
By Bob
GM Specialist
02/11/2022Q: How to install the Garnish Molding-Center Pillar?
A:
You should position the garnish molding to the center pillar, connect the electrical connector to the temperature sensor, index the positioning tabs on the garnish molding to the corresponding holes in the center pillar, seat the 4 garnish molding retaining tabs to the center pillar, return the seat to neutral position and install the front and rear door sill plates.
By Bob
GM Specialist
02/11/2022Q: How to remove the Trim Panel-Side Rear Door?
A:
You should remove the cover from the trim panel, the 2 retaining screws from the trim panel, and the power window switch, release the fasteners that retain the trim panel to the door, and remove the trim panel from the door.
By Bob
GM Specialist
01/11/2022See more FAQs (14)