< Back ×
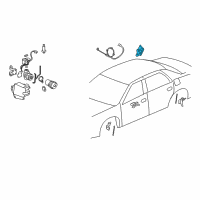
2008 Cadillac DTS Suspension Control Module
My Vehicle Change Vehicle
2008 Cadillac DTS
< Back to View All
Air Suspension
- Department
- Prices
 Product Specifications
- Notes: Dts; W/Variable Damping Susp.
- Other Names: Control Module
- Item Dimensions: 10.2 x 7.1 x 3.0 inches
- Item Weight: 1.70 Pounds
- Fitment Type: Direct Replacement
- Replaces: 15873517
- Part Description: 2008 Cadillac DTS Module Asm-Electronic Suspension Control
Vehicle Fitment- 2008 Cadillac DTS | Base, Livery, Luxury, Platinum, Premium | 8 Cyl 4.6 L GAS
 Product Specifications
- Notes: Dts; W/O Variable Damping Susp.
- Other Names: Control Module
- Item Dimensions: 5.3 x 3.2 x 1.5 inches
- Item Weight: 1.00 Pounds
- Fitment Type: Direct Replacement
- Replaces: 25994395, 15887869
- Part Description: 2008 Cadillac DTS Module Asm-Air Suspension Control
Vehicle Fitment- 2008 Cadillac DTS | Base, Livery, Luxury, Platinum, Premium | 8 Cyl 4.6 L GAS
FAQ for Suspension Control Module Repair
Q: How to remove the Automatic Level Control Sensor?
A:
You will need to raise the vehicle, remove the wheel, disconnect the height sensor connector, disconnect the sensor link from the ball stud, loosen the sensor mounting nut, disengage the anti-rotation tab and slide the sensor downward then remove the sensor.
By Bob
GM Specialist
02/11/2022Q: How to install the Automatic Level Control Sensor?
A:
You may need to insert the head of the sensor mounting stud into the keyhole, slide the sensor upward until the anti-rotation tab engages in the lower hole, tighten the sensor mounting nut to 9 N.m (80 lb in), then connect the sensor link on the ball stud, connect the height sensor connector, then install the wheel.
By Bob
GM Specialist
02/11/2022Q: What's the tip for replacing the Electronic Suspension Control Module?
A:
You may program the module if a replacement control module is installed.
By Bob
GM Specialist
01/11/2022Q: What's the preliminary procedure for replacing the Electronic Suspension Control Module?
A:
The procedure is to raise and support the vehicle, remove the tire and wheel, then remove the compartment trim panel.
By Bob
GM Specialist
01/11/2022Q: What's the recommended torque for the Electronic Suspension Control Module Nuts?
A:
The recommended torque is 9 N.m (80 lb in).
By Bob
GM Specialist
01/11/2022Q: How to remove the Air Suspension Control Module?
A:
You will need to remove the compressor assembly from the vehicle and place it on a bench, disconnect the electrical connector, release the control module upper and lower tabs, and then remove the control module from the bracket.
By Bob
GM Specialist
01/11/2022Q: How to install the Air Suspension Control Module?
A:
You may need to install the control module to the bracket and ensure the upper and lower locking tabs are engaged, connect the electrical connector, then install the compressor assembly and perform the suspension position calibration procedure.
By Bob
GM Specialist
01/11/2022Q: How many Electronic Suspension Control Module Nuts are needed?
A:
2Electronic Suspension Control Module Nuts attach.
By Bob
GM Specialist
01/11/2022See more FAQs (3)