< Back ×
2008 Cadillac SRX Liftgate Hinge
My Vehicle Change Vehicle
2008 Cadillac SRX
< Back to View All
Trunks & Tailgates
- Department
- Prices
 Product Specifications
- Location: Driver Side
- Other Names: Hinge
- Item Dimensions: 5.9 x 5.7 x 5.5 inches
- Item Weight: 1.00 Pounds
- Fitment Type: Direct Replacement
- Part Description: 2008 Cadillac SRX Hinge Asm-Lift Gate (Lift Gate Side)
Vehicle Fitment- 2008 Cadillac SRX | Base | 6 Cyl 3.6 L GAS, 8 Cyl 4.6 L GAS
- Product Specifications
- Location: Passenger Side
- Other Names: Hinge
- Item Dimensions: 5.7 x 5.5 x 5.4 inches
- Item Weight: 1.00 Pounds
- Fitment Type: Direct Replacement
- Part Description: 2008 Cadillac SRX Hinge Asm-Lift Gate (Lift Gate Side)
Vehicle Fitment- 2008 Cadillac SRX | Base | 6 Cyl 3.6 L GAS, 8 Cyl 4.6 L GAS
FAQ for Liftgate Hinge Repair
Q: How to remove the Liftgate Hinge?
A:
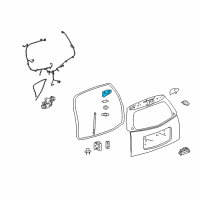
You should open the liftgate, use a grease pencil to mark the location of the liftgate hinges, remove the grommet from the upper right corner of the vehicle body, disconnect the electrical connector and the washer hose, remove the grommet from the upper left corner of the vehicle body, disconnect the 2 electrical connectors, support the liftgate in the open position, remove the liftgate assist rods from the upper ball studs, open the access panel doors in the header trim panel and remove the nuts retaining the liftgate hinge to the vehicle, the liftgate from the vehicle, the bolts retaining the hinges to the liftgate and the liftgate hinges from the liftgate.
By Bob
GM Specialist
01/11/2022Q: How to remove the Liftgate Latch Striker?
A:
You should remove the rear compartment sill plate, use a grease pencil to mark the liftgate latch striker position, and remove the bolts securing the liftgate latch striker to the vehicle and the liftgate latch striker, and the gasket from the vehicle.
By Bob
GM Specialist
01/11/2022Q: How to install the Liftgate Latch Striker?
A:
You should position the liftgate latch striker and the gasket to the vehicle, install the bolts that secure the liftgate latch striker to the vehicle, adjust the liftgate latch striker as necessary and install the rear compartment sill plate.
By Bob
GM Specialist
01/11/2022