< Back ×
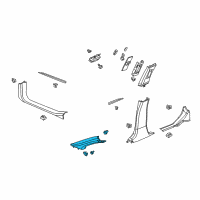
2008 Cadillac STS Pillar Panels
My Vehicle Change Vehicle
2008 Cadillac STS
< Back to View All
Interior & Exterior Trim
- Department
- Prices
 $85.56 MSRP:
$129.09You Save: $43.53 (34%)Product Specifications- Notes: Gray
- Location: Passenger Side
- Other Names: Weatherstrip Pillar Trim
- Item Dimensions: 29.8 x 6.0 x 3.5 inches
- Item Weight: 1.00 Pounds
- Fitment Type: Direct Replacement
- Part Description: 2008 Cadillac STS Weatherstrip Pillar Trim
Vehicle Fitment- 2008 Cadillac STS | Base, Platinum, V | 6 Cyl 3.6 L GAS, 8 Cyl 4.4 L GAS, 8 Cyl 4.6 L GAS
- $85.56 MSRP:
$129.09You Save: $43.53 (34%)Product Specifications- Notes: Cashmere
- Location: Driver Side
- Other Names: Weatherstrip Pillar Trim
- Item Dimensions: 29.8 x 6.1 x 3.4 inches
- Item Weight: 0.90 Pounds
- Fitment Type: Direct Replacement
- Part Description: 2008 Cadillac STS Weatherstrip Pillar Trim
Vehicle Fitment- 2008 Cadillac STS | Base, Platinum, V | 6 Cyl 3.6 L GAS, 8 Cyl 4.4 L GAS, 8 Cyl 4.6 L GAS
- Product Specifications
- Notes: Gray
- Location: Driver Side
- Other Names: Weatherstrip Pillar Trim
- Item Dimensions: 28.9 x 5.9 x 3.6 inches
- Item Weight: 0.90 Pounds
- Fitment Type: Direct Replacement
- Part Description: 2008 Cadillac STS Molding Asm-Windshield Side Garnish *Gray L
Vehicle Fitment- 2008 Cadillac STS | Base, Platinum, V | 6 Cyl 3.6 L GAS, 8 Cyl 4.4 L GAS, 8 Cyl 4.6 L GAS
OEM (Genuine) 2008 Cadillac STS Molding Asm-Windshield Side Garnish *Light Cashmere
PartNumber: 25782790Product Specifications- Notes: Cashmere
- Location: Passenger Side
- Other Names: Weatherstrip Pillar Trim
- Item Dimensions: 28.9 x 6.1 x 3.6 inches
- Item Weight: 1.00 Pounds
- Fitment Type: Direct Replacement
- Part Description: 2008 Cadillac STS Molding Asm-Windshield Side Garnish *Light Cashmere
Vehicle Fitment- 2008 Cadillac STS | Base, Platinum, V | 6 Cyl 3.6 L GAS, 8 Cyl 4.4 L GAS, 8 Cyl 4.6 L GAS
FAQ for Pillar Panels Repair
Q: What is the recommended torque for the rear shelf carrier fasteners?
A:
The recommended torque is 9 N.m (80 lb in).
By Bob
GM Specialist
02/11/2022Q: What should be noticed in the installation procedure for Sail Panel?
A:
You should ensure the shoulder belt is free of twists.
By Bob
GM Specialist
02/11/2022Q: How to install Rear Compartment Trim Panel?
A:
The procedure is to install the rear compartment side trim panels, install the rear compartment side trim panel retainers, install the rear compartment floor trim panel, install the rear compartment floor trim panel retainers, and install the rear compartment sill plate.
By Bob
GM Specialist
02/11/2022Q: How to install Center Pillar Garnish Molding?
A:
The procedure is to position the top of the locking tab to the slot in the sheet metal under the headliner, push upward to secure, position the upper trim locating tabs to the metal clips in the lock pillar, position the 3 plastic retainers to the holes in the lock pillar, push inward beginning at the top of the pillar and working downward to the floorplan to secure the center pillar trim, install the rear carpet retainers, install the front carpet retainers, enable the SIR system.
By Bob
GM Specialist
02/11/2022Q: How to install Rear Window Shelf Trim Panel?
A:
The procedure is to route the rear seat shelf panel to the rear cross car beam at the dual lock fasteners, position the rear center shoulder belt through the rear shelf panel, ensure the shoulder belt is not twisted, lower the rear shelf panel over the child restraint tether anchors and apply pressure at both dual lock fasteners, secure the shoulder belt escutcheon to the rear shelf panel, insert the escutcheon rearward and snap the front downward in place to secure, install both rear upper quarter sail panels, install the rear seat back, install the rear seat cushion.
By Bob
GM Specialist
02/11/2022Q: How to remove Rear Compartment Trim Panel?
A:
The procedure is to remove the rear compartment sill plate, remove the rear compartment floor trim panel retainers, remove the rear compartment floor trim panel, remove the rear compartment side trim panel retainers, and remove the rear compartment side trim panels.
By Bob
GM Specialist
02/11/2022Q: How to remove Rear Window Shelf Trim Panel?
A:
The procedure is to remove the rear seat cushion, remove the rear seat back, remove both rear upper quarter sail panels, disengage the center shoulder belt from the shoulder belt latch, disengage the shoulder belt escutcheon from the rear shelf, lift the rear shelf upward to disengage the center shoulder belt from the rear shelf, disengage the 2 dual lock fasteners at the rear edge of the shelf panel, lift upward and inward to remove the rear shelf panel.
By Bob
GM Specialist
02/11/2022Q: How to install Rear Shelf Carrier?
A:
The procedure is to install the rear shelf carrier assembly, connect the electrical connectors, install the rear shelf carrier fasteners, and install the rear shelf trim panel.
By Bob
GM Specialist
02/11/2022Q: How to remove Windshield Pillar Garnish Molding?
A:
The procedure is to open the door, remove the screw cover at the top of the garnish molding, remove the screw from the garnish molding, pull inward on the garnish molding to release the top of the molding from the headliner, pull inward at the center of the garnish molding to release the center part of the garnish molding.
By Bob
GM Specialist
02/11/2022Q: What is the recommended torque for the fastener securing the plastic push-in retainer to the hole in the sheet metal?
A:
The recommended torque is 2 N.m (18 lb in).
By Bob
GM Specialist
02/11/2022See more FAQs (16)