< Back ×
2008 Cadillac XLR Ignition Switch
My Vehicle Change Vehicle
2008 Cadillac XLR
< Back to View All
Ignition, Distributors & ECM
- Department
- Prices
 Product Specifications
- Notes: 1ST Design;2ND Design
- Other Names: Ignition Switch
- Item Dimensions: 3.2 x 2.0 x 2.1 inches
- Item Weight: 0.40 Pounds
- Fitment Type: Direct Replacement
- Replaces: 10354848, 10341789, 15894411
- Part Description: 2008 Cadillac XLR Switch Asm-Ignition & Start *Dark Argt Metal
Vehicle Fitment- 2008 Cadillac XLR | Base, Platinum, V | 8 Cyl 4.4 L GAS, 8 Cyl 4.6 L GAS
FAQ for Ignition Switch Repair
Q: What is the recommended torque for the negative battery cable?
A:
The recommended torque is 15 N.m (11 lb-ft).
By Bob
GM Specialist
01/11/2022Q: What should be noted in the measurement of Frequency?
A:
You should know that connecting the digital multimeter (DMM) to the circuit before pressing the Hz button will allow the DMM to auto-range to an appropriate range.
By Bob
GM Specialist
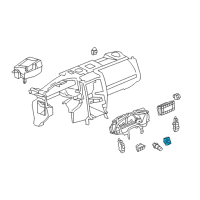
01/11/2022Q: How to install the Ignition and Start Switch?
A:
You should install the ignition switch into position on the DIC pod, the DIC switch pod, and the driver knee bolster trim panel.
By Bob
GM Specialist
01/11/2022Q: How to remove the Ignition and Start Switch?
A:
You should remove the driver knee bolster trim panel, the driver information center (DIC) switch, and the ignition switch from the DIC pod.
By Bob
GM Specialist
01/11/2022Q: How to measure the Frequency?
A:
You should apply power to the circuit, set the rotary dial of the DMM to the V (AC) position, connect the positive lead of the DMM to the circuit to be tested, connect the negative lead of the DMM to a good ground, and press the Hz button on the DMM.
By Bob
GM Specialist
01/11/2022