< Back ×
2009 Cadillac XLR Fuel Door Actuators
My Vehicle Change Vehicle
2009 Cadillac XLR
< Back to View All
Fuel Doors & Gas Caps
- Department
- Prices
 Product Specifications
- Notes: Xlr
- Other Names: Actuator, Lock Actuator
- Item Dimensions: 13.1 x 9.2 x 4.5 inches
- Item Weight: 0.80 Pounds
- Fitment Type: Direct Replacement
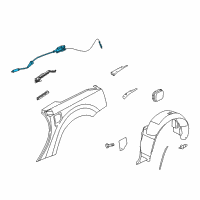
- Part Description: 2009 Cadillac XLR Actuator Asm-Fuel Tank Filler Door Lock
Vehicle Fitment- 2009 Cadillac XLR | Base, Platinum, V | 8 Cyl 4.4 L GAS, 8 Cyl 4.6 L GAS
FAQ for Fuel Door Actuators Repair
Q: What is the fuel tank filler door lock release switch installation procedure?
A:
First, connect the electrical connector to the switch and place the fuel filler door release switch on the knee bolster trim panel. Next push the switch to secure the switch retaining tabs into the trim panel.
By Bob
GM Specialist
29/10/2022Q: What is the fuel tank filler door lock actuator installation procedure?
A:
Place the actuator, install the bolt attaching the actuator and tighten the nut to 2 Nm. Next connect the electrical connector, the manual release cable, and the fuel door release to the actuator. Make sure to tighten the actuator nut to 2 Nm. Install the bolt attaching the actuator and tighten it to 2 Nm. After that, install the cable to the fuel pocket, install the nut, and the driver-side rear compartment trim. Finally, install the wheelhouse liner panel.
By Bob
GM Specialist
29/10/2022