< Back ×
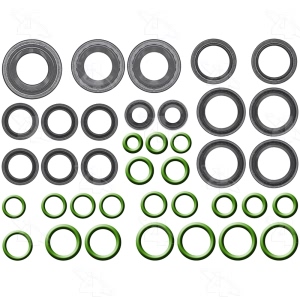
2009 Chevrolet Trailblazer A/C System Seal Kit
My Vehicle Change Vehicle
2009 Chevrolet Trailblazer
< Back to View All
A/C & Heating
- Department
- Brands
- Prices
 $11.73Product Specifications
- Notes: O-Ring & Gasket Seal Kit; w/Rear AC
- Material: Green O-Rings, Black Aluminum Gaskets
- Style: O-Ring & Gasket Kit
- UPC: 096361267381
- Part Description: 2009 Chevrolet Trailblazer A C System O Ring And Gasket Kit
Vehicle Fitment- 2009 Chevrolet Trailblazer | All Trims | 6 Cyl 4.2L
- 2009 Chevrolet Trailblazer | All Trims | 8 Cyl 6.0L
 Product Specifications
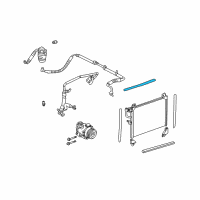
- Notes: 4.2 Liter, Short Wheelbase
- Item Dimensions: 22.6 x 1.8 x 0.6 inches
- Item Weight: 0.30 Pounds
- Fitment Type: Direct Replacement
- Require Quantity: 2
- Part Description: 2009 Chevrolet Trailblazer Seal, A/C Condenser
Vehicle Fitment- 2009 Chevrolet Trailblazer | Base, LS, LT, LTZ, North Face | 6 Cyl 4.2 L GAS
 Product Specifications
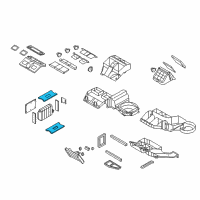
- Notes: 5.3 & 6.0 Liter, Front; 4.2 Liter, Front
- Other Names: Evaporator Core Seal
- Item Weight: 0.80 Pounds
- Fitment Type: Direct Replacement
- Part Description: 2009 Chevrolet Trailblazer Evaporator Core Seal
Vehicle Fitment- 2009 Chevrolet Trailblazer | Base, LS, LT, SS | 6 Cyl 4.2 L GAS, 8 Cyl 5.3 L GAS, 8 Cyl 6.0 L GAS
 Product Specifications
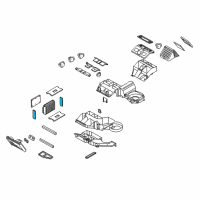
- Notes: 5.3 & 6.0 Liter, Front; 4.2 Liter, Front
- Other Names: End Seal, Evaporator Core Seal, Seal
- Item Dimensions: 4.1 x 3.1 x 13.3 inches
- Item Weight: 0.40 Pounds
- Fitment Type: Direct Replacement
- Part Description: 2009 Chevrolet Trailblazer Seal, A/C Evaporator
Vehicle Fitment- 2009 Chevrolet Trailblazer | Base, LS, LT, LTZ, North Face, SS | 6 Cyl 4.2 L GAS, 8 Cyl 5.3 L GAS, 8 Cyl 6.0 L GAS
FAQ for A/C System Seal Kit Repair
Q: How to remove the O-Ring?
A:
First, you need to disassemble the A/C refrigerant components and remove the O-ring seal from the A/C refrigerant component. Then, please inspect the O-ring seal for signs of damage to help determine the root cause of the failure and inspect the A/C refrigerant components for damage or burrs. Finally, you should cap or tape the A/C refrigerant components and discard the O-ring seal.
By Bob
GM Specialist
28/10/2022Q: How to install the O-Ring?
A:
First, you need to inspect the new O-ring seal for any signs of cracks, cuts, or damage and remove the cap or tape from the A/C refrigerant components. Then, please use a lint-free clean, dry cloth to clean the sealing surfaces of the A/C refrigerant components and coat the new O-ring seal with mineral base 525 viscosity refrigerant oil. Finally, you should slide the new O-ring seal onto the A/C refrigerant component and assemble the A/C components.
By Bob
GM Specialist
28/10/2022Q: How to install the Sealing Washer?
A:
First, you need to inspect the new seal washer for any signs of cracks, cuts, or damage. Then, please remove the cap or tape from the A/C refrigerant components and use a lint-free clean, dry cloth to clean the sealing surfaces of the A/C refrigerant components. Finally, you should install the new seal washer onto the A/C refrigerant component and assemble the remaining A/C refrigerant components.
By Bob
GM Specialist
28/10/2022Q: How to remove the Sealing Washer?
A:
First, you need to remove the seal washer from the A/C refrigerant component. Then, please inspect the seal washer for signs of damage to help determine the root cause of the failure. Finally, you should inspect the A/C refrigerant components for damage or burrs and discard the sealing washer.
By Bob
GM Specialist
28/10/2022