< Back ×
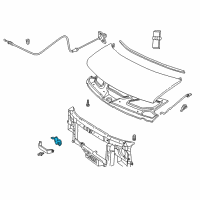
2009 Chevrolet Trailblazer Hood Latch
My Vehicle Change Vehicle
2009 Chevrolet Trailblazer
< Back to View All
Hoods
- Department
- Prices
 $69.78 MSRP:
$105.29You Save: $35.51 (34%)Product Specifications- Notes: Chevrolet & GMC
- Other Names: Latch, Lock
- Item Dimensions: 5.8 x 5.7 x 2.5 inches
- Item Weight: 1.10 Pounds
- Fitment Type: Direct Replacement
- Replaces: 15135072, 15955509, 15233704
- Part Description: 2009 Chevrolet Trailblazer Latch
Vehicle Fitment- 2009 Chevrolet Trailblazer | Base, LS, LT, LTZ, North Face, SS | 6 Cyl 4.2 L GAS, 8 Cyl 5.3 L GAS, 8 Cyl 6.0 L GAS
FAQ for Hood Latch Repair
Q: How to remove the Hood Primary and Secondary Latch?
A:
First, you need to remove the grille and use a grease pencil or other suitable marking device to mark the location of the latch on the mounting bracket. Then, please remove the bolts that retain the latch to the mounting bracket and disconnect the hood latch cable from the latch. Finally, you should remove the latch from the vehicle.
By Bob
GM Specialist
01/11/2022Q: How to install the Hood Primary and Secondary Latch?
A:
First, you need to connect the hood latch cable to the latch and position the latch to the previously marked location on the mounting bracket. Then, please install the bolts which retain the latch to the mounting bracket and inspect the latch for proper operation before closing the hood. Finally, you should check the alignment of the latch to the hood striker and install the grille.
By Bob
GM Specialist
01/11/2022Q: How to adjust the Hood Latch?
A:
First, you need to loosen the bolts retaining the hood latch to the support bracket. Then, please move the hood latch from side to side until the striker enters the center of the latch assembly.
By Bob
GM Specialist
01/11/2022Q: How to remove the Hood Latch Support?
A:
First, you need to remove the headlamp housing panel and the hood latch. Then, please remove the bolts that retain the hood latch support to the radiator support. Finally, you should remove the hood latch support from the vehicle.
By Bob
GM Specialist
01/11/2022Q: How to inspect the Hood Latch?
A:
First, you need to release the primary hood latch to inspect the operation of the pop-up spring. Then, please attempt to raise the hood while the hood is in the pop-up position.
By Bob
GM Specialist
01/11/2022Q: How to install the Hood Latch Support?
A:
First, you need to install the hood latch support to the vehicle. Then, please install the bolts that retain the hood latch support to the radiator support. Finally, you should install the hood latch and the headlamp housing panel.
By Bob
GM Specialist
01/11/2022Q: How to remove the Hood Rear Seal?
A:
First, you need to open the hood. Then, please remove the rear hood seal from the air inlet grille panel studs. Finally, you should remove the seal from the air inlet grille panel.
By Bob
GM Specialist
01/11/2022Q: How to install the Hood Rear Seal?
A:
First, you need to position the seal to the air inlet grille panel. Then, please install the rear hood seal to the air inlet grille panel studs. Finally, you should close the hood.
By Bob
GM Specialist
01/11/2022See more FAQs (3)