< Back ×
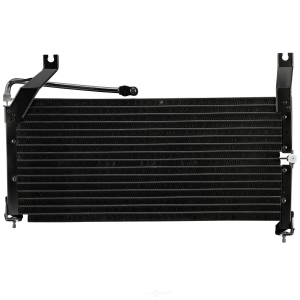
2001 Chevrolet Metro A/C Condenser
My Vehicle Change Vehicle
2001 Chevrolet Metro
< Back to View All
A/C & Heating
- Department
- Brands
- Prices
 Product Specifications
- Notes: (Condenser Only; Drier Not Incld)
- Color / Finish: Silver or Black
- Fitting 1 Gender: Male
- Fitting 2 Gender: Male
- Height: 11.0
- Installation Instructions Included: No
- Internet Product Code (IPC): C4F20BA54A3
- Item Grade: OEM Standard
- Item has MSDS (SDS): N
- Material: Aluminum
- MFG Brand Name: Spectra Premium
- MFG Model # (Series): 7-4662
- MFG Name: Spectra Premium Industries
- Package Contents: 1 x Condenser
- Product Condition: New
- Refrigerant Compatibility: All
- Supplier Company Name: Spectra Premium Industries
- UPC: 671607168310
- Part Description: A/C Condenser
 Product Specifications
- Other Names: Condenser
- Item Dimensions: 30.9 x 20.9 x 8.6 inches
- Item Weight: 13.70 Pounds
- Fitment Type: Direct Replacement
- Part Description: Condenser, A/C
FAQ for A/C Condenser Repair
Q: What is the removal procedure for the condenser?
A:
You need to disable the Supplemental Inflatable Restraint (SIR) system, discharge and recover the refrigerant, disconnect the negative battery cable, remove the front bumper, disconnect the hood latch cable, slide the hood latch cable out from the hood latch assembly, disconnect the electrical connector from the SIR forward discriminating sensor, disconnect the condenser fan electrical connector and the 2 horn electrical connections, remove 1 bolt and the horn, connect the Receiver-dryer outlet-to-evaporator inlet pipe fitting, remove 1 nut and the discharge hose, the 6 screws and the radiator center brace, the 2 condenser mounting bolts and the condenser, cap the refrigerant system openings, remove the 2 bolts and the 2 screws from the condenser fan, and the condenser fan from the condenser.
By Bob
GM Specialist
01/11/2022Q: How to install the condenser fan relay?
A:
You need to install the condenser fan relay to the relay box, and the relay box lid.
By Bob
GM Specialist
01/11/2022Q: What is the recommended torque for the discharge hose to the condenser nut?
A:
The recommended torque is 9.8 Nm (86.74 lb in).
By Bob
GM Specialist
01/11/2022Q: What is the removal procedure for the condenser fan relay?
A:
You need to remove the relay box lid and the condenser fan relay from the relay box.
By Bob
GM Specialist
01/11/2022