< Back ×
2009 Chevrolet Trailblazer Pillar Panels
My Vehicle Change Vehicle
2009 Chevrolet Trailblazer
< Back to View All
Interior & Exterior Trim
- Department
- Prices
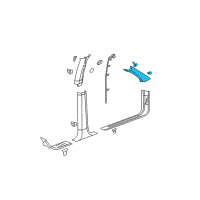
OEM (Genuine) 2009 Chevrolet Trailblazer Molding Asm-Windshield Side Garnish *Light Opel Gray
PartNumber: 15782066Product Specifications- Notes: W/O Xuv, Gray
- Location: Passenger Side
- Other Names: Weatherstrip Pillar Trim
- Item Dimensions: 30.3 x 8.5 x 8.5 inches
- Item Weight: 2.20 Pounds
- Fitment Type: Direct Replacement
- Part Description: 2009 Chevrolet Trailblazer Molding Asm-Windshield Side Garnish *Light Opel Gray
Vehicle Fitment- 2009 Chevrolet Trailblazer | Base, LS, LT, SS | 6 Cyl 4.2 L GAS, 8 Cyl 5.3 L GAS, 8 Cyl 6.0 L GAS
- Product Specifications
- Notes: W/O Xuv, Gray
- Location: Driver Side
- Other Names: Weatherstrip Pillar Trim
- Item Dimensions: 32.6 x 5.9 x 3.3 inches
- Item Weight: 0.70 Pounds
- Fitment Type: Direct Replacement
- Part Description: 2009 Chevrolet Trailblazer Molding, Windshield Side Garnish
Vehicle Fitment- 2009 Chevrolet Trailblazer | Base, LS, LT, SS | 6 Cyl 4.2 L GAS, 8 Cyl 5.3 L GAS, 8 Cyl 6.0 L GAS
FAQ for Pillar Panels Repair
Q: How to remove the Center Pillar Garnish Molding?
A:
First, you need to remove the front and rear door sill plates and move the seat to a forward position. Then, please partially remove the door opening weatherstrip from the door opening where it interferes with molding removal. Finally, you should release the 4 retaining clips that attach the garnish molding to the center pillar, disconnect the electrical connector from the temperature sensor, and remove the garnish molding from the vehicle.
By Bob
GM Specialist
02/11/2022Q: How to remove the Body Side Rear Window Garnish Molding (TrailBlazer, Envoy)?
A:
First, you need to remove the bolt that retains the seat belt upper anchor to the body. Then, please remove the garnish molding from the vehicle.
By Bob
GM Specialist
02/11/2022Q: How to install the Body Side Rear Window Garnish Molding (TrailBlazer, Envoy)?
A:
First, you need to install the garnish molding on the vehicle. Then, please install the seat belt retractor to the body. Finally, you should install the bolt that retains the seat belt anchor to the body.
By Bob
GM Specialist
02/11/2022Q: How to remove the Body Side Window Rear Garnish Molding (TrailBlazer, Envoy)?
A:
First, you need to remove the bolt that retains the seat belt upper anchor to the body. Then, please remove the garnish molding from the vehicle.
By Bob
GM Specialist
02/11/2022Q: How to install the Center Pillar Garnish Molding?
A:
First, you need to position the garnish molding to the center pillar and connect the electrical connector to the temperature sensor. Then, please index the positioning tabs on the garnish molding to the corresponding holes in the center pillar, seat the 4 garnish molding retaining tabs to the center pillar, and fully install the door opening weatherstrip. Finally, you should return the seat to the neutral position and install the front and rear door sill plates.
By Bob
GM Specialist
02/11/2022Q: How to install the Liftgate Garnish Molding
A:
First, you need to install the garnish molding on the liftgate. Then, please ensure that the top 4 garnish molding retainers are fully seated first. Finally, you should install the 2 garnish molding retainers on each side.
By Bob
GM Specialist
02/11/2022Q: How to install the Body Side Window Rear Garnish Molding (TrailBlazer, Envoy)?
A:
First, you need to install the garnish molding on the vehicle. Then, please install the seat belt retractor to the body. Finally, you should install the bolt that retains the seat belt anchor to the body.
By Bob
GM Specialist
02/11/2022Q: How to remove the Liftgate Garnish Molding?
A:
First, you need to use a flat-bladed tool to carefully release the garnish molding retainers. Then, please remove the garnish molding from the liftgate.
By Bob
GM Specialist
02/11/2022Q: What is the recommended torque for the anchor bolt?
A:
The recommended torque is 70 N.m (52 lb-ft).
By Bob
GM Specialist
02/11/2022Q: How to install the Door Handle Bezel?
A:
First, you need to install the bezel to the door, ensuring that all 4 retaining tabs are fully seated. Then, please install the door trim panel to the door.
By Bob
GM Specialist
01/11/2022See more FAQs (14)